
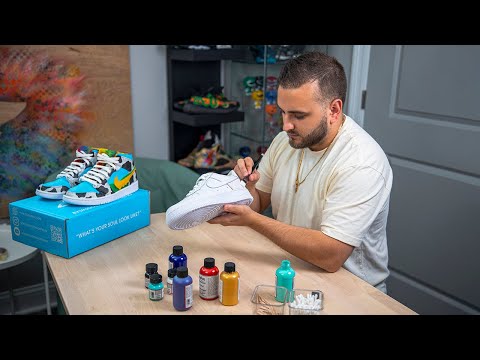
Customizing Sneaker Slippers: Sneaker slippers merge the comfort of slippers with the style of casual sneakers. This fashionable hybrid footwear has taken off in recent years as more brands offer their own takes on slipper-sneaker fusion.
But with some creativity, you can accomplish the task of Customizing Sneaker Slippers of your own at home for a DIY twist. This lets you make exactly the pair you want – choosing fabrics and personal touches that match your taste.
In this blog post, we’ll walk through a step-by-step sneaker slipper DIY guide. Follow along to make your own comfy-chic kicks!
Customizing Sneaker Slippers : Gather Your Materials
Before starting any DIY project, you need to gather the required materials. To make your own sneaker slippers, you’ll need:
- Old pair of sneakers
- Slipper soles
- Fabric for slipper uppers
- Foam/cushioning
- Glue
- Scissors
- Additional decorative elements (optional)
Old sneakers form the base to transform into slipper style. Canvas or knit fabric styles work best. Make sure to pick a well-worn, older pair since the process will destroy them for wearing as regular shoes.
Slipper soles replace the original sneaker soles. Look for flexible rubber soles about 1⁄4-1⁄2 inch thick, available at most craft stores. These mimic the gripper bottoms of slippers.
Uppers fabrics can be any soft materials like flannel, fleece, wool or your favorite cozy textile. Get about 1⁄2 yard to have enough.
Foam or cushioning adds plush padding. Craft foam sheets or upholstery foam work perfectly.
Glue securely bonds elements, so use a strong flexible variety meant for fabrics and foam.
Scissors cut shapes from foam and fabric. Craft scissors provide extra precision with sharp points.
Extras like sequins, buttons and fabric paint invite creativity. But they’re optional – you can make classic sneaker slippers using only basics too!
| DIY Sneaker Slippers Shopping List |
|---|
| • Old sneakers (base shoes) |
| • Slipper soles |
| • 1⁄2 yard upper fabric |
| • Foam sheets |
| • Fabric glue |
| • Craft scissors |
| • Decorative extras (optional) |

With your toolbox of supplies ready, you’re set to start Customizing Sneaker Slippers
Step 1: Prep the Shoe Base
The first step is prepping the base sneakers:

- Remove original shoe laces and discard since you won’t need them.
- Take out original insoles to access full shoe interior. These also get tossed.
- Cut off old sneaker soles using sharp scissors. Removing them entirely leaves just the upper shoe portion.
- Sand shoe rim where you cut so no rough edges remain. It should lay flat.
Repeat on both shoes so you have two clean sneaker uppers stripped down for transforming.
Pro Tip: Put a piece of cardboard inside shoes while cutting to avoid damaging interiors!
Then clean shoe interiors thoroughly since these form visible exteriors when finished.
With laces gone, soles removed, edges smoothed and interiors scrubbed, you now have the perfect sneaker blank canvases!
Step 2: Make New Soles
Now for creating the slipper soles in Customizing Sneaker Slippers:
- Trace outline of shoe bottoms onto slipper sole material. This captures exact shape and size needed.
- Cut two sole pieces matching your outlines.
- Glue bottom edge of each sneaker base evenly. Work glue well into the fabric.
- Firmly adhere soles while glue is still wet. The grippy slipper bottoms are now attached!
Make sure not to get glue on sole bottom surface so traction remains intact.
Step 3: Create Cozy Uppers
Moving up to the fun part – making plush slipper uppers for Customizing Sneaker Slippers
- Trace each shoe outline on paper, adding about 1⁄2 inch border all around. Cut these shapes.
- Use paper outlines to cut two pieces of fabric, foam and any liner material. The extra border adds sewing allowance.
- Stack layers for each shoe: glue fabric to foam backing for cushioning. Add an optional flannel or other lining too.
- Sew slipper uppers, stitching the fabric border while leaving top open for foot entry. Trim any uneven edges.
- Attach uppers over shoe base exterior with glue around the bottom perimeter edge. Smooth evenly onto shoes.
And with that, the main sneaker slipper structure is built! Now for personalization…
Step 4: Add Unique Touches
With our slipper sneaker foundations made, the fun creative touches come in the process of Customizing Sneaker Slippers
★ Pick pretty accents – get decorative with ribbons, buttons, appliques, painted designs or sparkly bits like sequins or rhinestones!
★ Choose complementary laces if you’d like – swap those old boring white shoelaces for patterned or colored ones more suiting the bright fabrics.
★ Consider protective sprays – spray fabric sealant protects against stains and moisture so you can safely wear these fuzzyslippers out and about.
However you decide to make your DIY sneaker slippers special, put thought into details reflecting YOU. Customization takes these from basic to beautiful!

And just like that, you have your very own customized sneaker slippers!
| Success Checklist |
|---|
| ✓ Shoe base prepped |
| ✓ New soles attached |
| ✓ Fabric uppers sewn |
| ✓ Uppers glued to shoes |
| ✓ Personal accents added |
Nice job – wear your special kicks with pride!
More DIY Tips & Inspiration
Looking to take your project of Customizing Sneaker Slippers further? Here are bonus ideas for advanced options:
Convert other shoe styles
- Instead of low tops, try transforming boots, Mary Janes or sandals using the same concepts. More shoe variety means more DIY possibilities!
Design mixed-media looks
- Combine different textiles like a wool upper with a faux fur cuff or metallic fabric tongues. The material mixes make them extra snazzy.
Build slip-on ease
- Sew openings closed and create a heel notch instead of an open top. This tweak transforms lace-ups into more slipper-like pull on entry and exit.
Add weather protection
- For outdoor durability, incorporate layers like waterproof linings or traction gel pads under soles. This lets you take your cozy kicks outdoors worry-free!
Craft detachable elements
- Make decorative fabric flowers, bows or pompoms that attach on with ties or snaps instead of permanent gluing. The switchability lets you change up styles.
Shop secondhand
- Check out local thrift stores which often have fun retro sneakers ripe for renewing into trendy slippers. Vintage foundations means more one-of-a-kind end results.
The desire to keep enhancing shows the creativity flowing strong! Part of the reward of DIY comes from imagining future projects to try.
So if you catch the making bug, diagram out ideas for your next endeavor of Customizing Sneaker Slippers. Perhaps gifts for friends and family might come next?
Well, go ahead and kick back to break in your new custom kicks – and dream up what other cozy designs you may want to get crafty conjuring sometime soon!