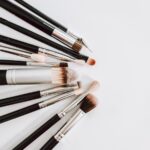
Eye Makeup – The eyes may be the window to the soul, but the right makeup transforms them into utterly mesmerizing focal points. With countless eye products and application techniques, creating a gorgeous eye look can seem daunting. Follow this step-by-step eye makeup tutorial to achieve showstopping eyes for any occasion.
Priming Prep for Eye Makeup
Always start your eye makeup with a clean eye area freshly moisturized to create the ideal base. Apply:
- Eye primer specifically formulated for lids to control oil and make eye shadow last without fading or creasing. Pat on gently with a ring finger. Primer creates a smooth, even canvas that grips powder and cream shadows. This prevents muddying and slippage that can occur on bare oily lids.
- Color correcting concealer to neutralize any discoloration, veins, or redness on the lids and under eye area. Use a peachy tone to cancel out dark circles. Green concealer offsets redness. And purple neutralizes sallow yellow tones. Concealer provides the ideal blank backdrop for truer shadow shades.
Blend primer and concealer well over the entire lid up to the brow bone using either fingers or a damp makeup sponge for seamless application. Avoid rubbing, which can tug delicate eyelid skin. The smoothed, even base allows eye makeup to really pop.
Defining Brows
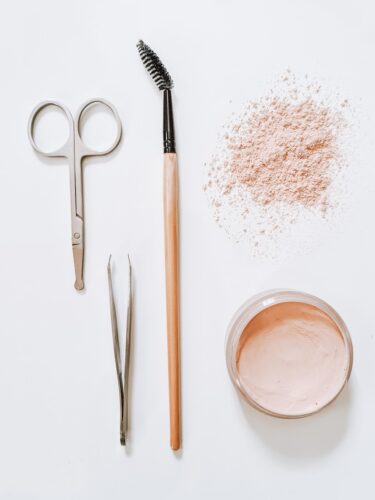
Frame your eyes and emphasize your gaze by grooming and filling in your eyebrows with:
- Brow pencil in a matching shade to fill in any sparse or overplucked areas with hair-like strokes. The tiny tip lets you draw on fine lines that mimic real brow hairs. Extend the inner corners towards the bridge of your nose for a lifted look.
- Brow pomade for fuller brows. Use an angled brush to apply the creamy pomade in featherlike strokes. Pomades tint brow hairs while adding fuller texture and definition.
- Clear brow gel to tame hairs in place. Comb through brows with a spoolie brush to set them neatly in position all day.
- Concealer to sharpen edges for a polished look. Run the concealer along the top and bottom edges of your brows with an angled brush to carve out the shape.
Follow the natural shape of your brows and resist overplucking or drawing on an unnaturally sharp arch. Well-groomed brows with softened edges frame your Eye Makeup beautifully.
Sweeping on Shadow
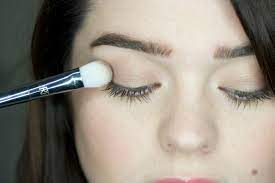
Eye Makeup – Using eye shadow brushes, apply eye shadow in this precise order:
- Base shade – Apply a neutral tone closest to your skin tone across the entire lid up to right below the brow bone. This provides a seamless transition from your skin to the colors layered on top. Use a fluffy brush to blend this from lashline to crease.
- Transition shade – Sweep a medium hue like a soft brown, tan or muted pink through the crease and into the outer corner. This creates depth and shapes the eye socket. Use a tapered blending brush to extend the crease color just above where the natural socket lies. Blend out any harsh lines.
- Feature shade – Pat your key shimmery metallic or darker mattes onto the actual lid and inner eye corner. This shade makes your eyes pop and grabs attention. Try golds, bronzes, plums, emeralds, or other richly pigmented tones. Apply with a flat shadow brush for concentrated color payoff.
- Lower lash color – Soften your lower lash line by smudging a lighter version of your crease shade underneath, about halfway toward the inner rim. This grounds the eye look and connects the top shadow to the bottom lash area.
- Highlight shade – Finish by dabbing an illuminating shimmer in the very inner eye corners and center of the lid. Choose a shade a few tones lighter than your skin to open up eyes. Matte highlighters like ivory also brighten beautifully.
Thoroughly blend the edges of each layer with a clean fluffy brush to diffuse any harsh lines. The eye shadows should transition seamlessly into each other. Follow your natural contours, allowing the darker shades in the outer crease to recede and light shades on the inner lid to widen eyes.
Creating Winged Liner
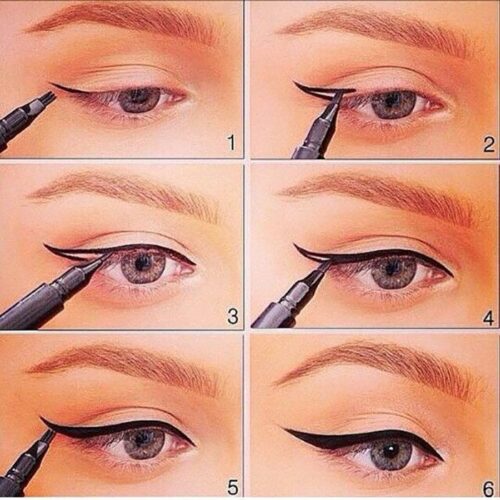
Take your eye look to the next level by adding winged eyeliner. For precision, use liquid liner which allows you to paint on an inky, graphic line. Gel pots offer similar intense color. For softer definition, choose pencil liner. Sharpen pencils frequently for the most accurate application.
Follow these steps to create flawless winged liner:
- With eyes open, draw the liner across your upper lash line starting from the inner corner. Extend the line just slightly past the outer corner of your eye.
- At the outer edge, flick your wrist and glide the liner up and out to make a wing angled up towards your temples. Make the wing as long and dramatic as desired.
- Connect the wing back to the liner on your lash line by drawing a line down to the outer corner of your eye. Fill any gaps along the lash line for a seamless look.
- For added intensity, line your lower inner rim along the waterline. Tightline by pressing liner into the roots of your upper lashes.
Let the liner dry fully before applying mascara or inserting contact lenses to avoid smudging your work. The precision of the winged shape helps lift and elongate the eyes.
Curling & Mascara
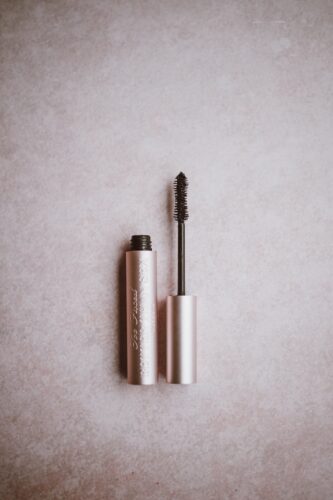
No eye makeup look is complete without long, lifted, lush lashes to frame your eyes. Amplify your lashes using:
- Eyelash curler – Start by squeezing the curler at the base of your lashes and hold for about ten seconds. This creates an initial tight curl. Slowly pulse the curler down the entire lash line to the very tips for extra lift all along the lashes. Apply gentle pressure, taking care not to pinch delicate eyelid skin. For wide eyes, angle the curler outward while squeezing. Pointing it inward helps round eyes appear more almond-shaped.
- Mascara – Wiggle and sweep mascara onto your upper and lower lashes using a zigzag motion. This ensures each lash gets evenly coated from root to tip for maximum length and thickness. Allow the first layer to dry fully before applying a second coat, and a third if desired for added drama. Waterproof mascara resists smudging and holds a curl longer.
Proper curling and mascara application framed your eyes beautifully while accentuating their shape. Run a clean spoolie brush back through lashes to remove any clumps.
Finishing Touches
After completing the core steps of eye priming, shadow, liner and mascara, you can further amp up the drama with accent details:
- Lash extensions – Individual or strip false lashes add length and volume. Carefully apply the strip or adhere individual lashes to your natural lash line using tweezers and lash glue. Press down firmly from inner to outer corner for secure hold.
- Colored mascara – Make eyes pop by applying a vibrantly colored mascara as a finishing touch. Try cobalt blue, emerald green or bold purple paired with neutral shadows.
- Glitter liner – Metallic and multicolored glitter liners draw attention for nighttime euphoria. Press along the lash line or inner rims.
- Rhinestones – For special occasions, use lash glue to adhere tiny gems, pearls or crystals at the outer corners of your eyes or along the lash line. Add megawatt sparkle and glam.
- Faux mink lashes – These ultra fluffy lashes amplify volume and a doll-like flutter. Using high-quality, reusable mink lashes saves time over daily extensions.
With practice, you can customize these finishing touches to create signature eye looks that play up your unique features and eye shape.
Master the Art of Mesmerizing Eye Makeup
As you can see, a mesmerizing eye look involves careful technique but delivers striking results. Follow these steps to take your eyes from plain to dazzling: properly prep lids, frame with filled brows, layer coordinating shadows, define with winged liner and build up lush lashes. Then make it uniquely your own by experimenting with accent colors, liners, rhinestones or faux lashes.
With this comprehensive guide and regular practice, you’ll gain the confidence to create stunning eyes for any occasion. Accentuate your best features in a way that complements your personal style. Let your eyes make an unforgettable impression! Soon you’ll be able to achieve salon-worthy eyes in the comfort of your own home. Dazzle everyone with your artistically enhanced eyes. Just remember – proper tools and products do make a difference for flawless eye makeup application. Invest in quality brushes, shadows and mascara to bring out your mesmerizing eyes.CopyRetry

