How to Make Bracelet: Making your own bracelet can be a fun and rewarding experience that allows you to express your creativity and personal style. Whether you’re looking to create a simple friendship bracelet or a more intricate beaded design, there are a variety of techniques and materials to choose from. By following a few basic steps and practicing some essential skills, you can create a unique and beautiful piece of jewelry that you’ll be proud to wear or give as a gift.
To get started, you’ll need to gather some basic materials, including string or cord, beads or charms, and a clasp or closure. You’ll also need some basic tools, such as scissors, pliers, and a bead mat or board. Once you have your supplies, you can choose a bracelet style and begin practicing some basic techniques, such as knotting and weaving patterns. It’s important to prepare your workspace and measure and cut your string or cord to the appropriate length before you begin adding beads and charms.
Key Takeaways
- Making your own bracelets allows you to express your creativity and personal style.
- To get started, you’ll need to gather basic materials and tools and choose a bracelets style.
- Practice essential skills, such as knotting and weaving patterns, and take care to prepare your workspace and measure and cut your string or cord to the appropriate length.
How to Make Bracelet
Materials Needed

Making your own bracelets is a fun and creative project that requires some basic materials. Here are the materials you will need to get started:
1. Beads
Beads are the most important material for making a bracelet. You can choose from a variety of beads including glass, plastic, wood, metal, and gemstones. Beads come in different sizes, shapes, and colors, so choose the ones that match your style and preference.
2. Stringing Material
Stringing material is what you will use to hold the beads together. There are many options to choose from including elastic cord, nylon thread, wire, leather cord, and hemp cord. Choose a stringing material that is strong and durable enough to hold the weight of the beads.
3. Clasps
A clasp is what you will use to fasten your bracelets. There are many types of clasps to choose from including lobster clasps, toggle clasps, magnetic clasps, and hook-and-eye clasps. Choose a clasp that is easy to use and matches the overall style of your bracelets.
4. Tools
You will need some basic tools to make your bracelet. These include scissors, pliers, wire cutters, and crimping tools. These tools will help you cut the stringing material, attach the clasp, and secure the beads in place.
Overall, making a bracelet is an easy and enjoyable project that requires just a few basic materials. With the right materials and tools, you can create a beautiful and unique bracelets that matches your style and personality.
Choosing a Bracelet Style
When it comes to choosing a bracelet style, there are many options to consider. Here are some factors to keep in mind:
1. Occasion
Consider the occasion for which you will be wearing the bracelets. Is it for everyday wear, a special event, or a formal occasion? For a casual look, consider a simple beaded bracelets or a leather cuff. For a more formal occasion, you may want to choose a bracelet with precious stones or pearls.
2. Material
Bracelets can be made from a variety of materials, including metal, leather, beads, and fabric. Consider which materials you prefer and which will best suit your style and needs. For example, a metal bracelet may be more durable and long-lasting, while a fabric bracelet may be more lightweight and comfortable to wear.
3. Size and Fit
Make sure to choose a bracelet that fits comfortably on your wrist. Measure your wrist before purchasing a bracelet to ensure a proper fit. If you are choosing a bracelet with a clasp, make sure it is adjustable to ensure a proper fit.
4. Personal Style
Ultimately, the most important factor in choosing a bracelet style is your personal style and taste. Choose a bracelet that reflects your personality and complements your overall look. Whether you prefer a simple and understated bracelets or a bold and statement-making piece, there is a bracelets style out there for everyone.
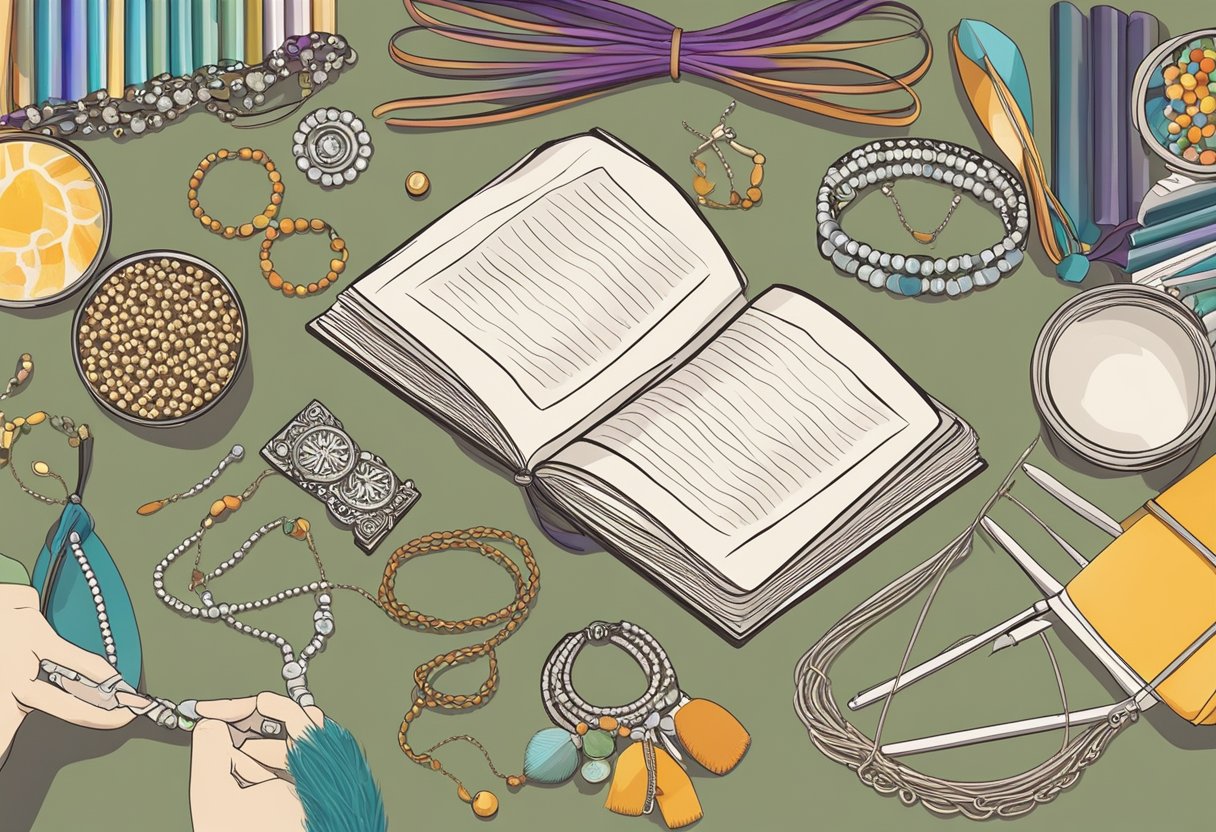
Basic Techniques

Making a bracelet can seem daunting at first, but it’s actually quite simple once you know the basic techniques. Here are some of the fundamental techniques you’ll need to know to make a bracelet:
Stringing
Stringing is one of the simplest techniques for making a bracelet. It involves threading beads or other materials onto a string or cord. You can use a variety of materials for stringing, including elastic cord, nylon thread, and wire. When stringing beads, it’s important to choose a cord that is strong enough to support the weight of the beads.
Knotting
Knotting is an essential technique for securing beads or other materials onto a string or cord. There are several types of knots you can use, including the overhand knot, the square knot, and the surgeon’s knot. Knotting not only secures the beads in place, but it also adds a decorative element to your bracelets.
Crimping
Crimping is a technique used to secure the ends of a string or cord. It involves using crimp beads or tubes to compress the cord and hold it in place. Crimping is essential for bracelets that use wire or other materials that can fray or unravel.
Adding a Clasp
Adding a clasp is the final step in making a bracelet. There are many types of clasps to choose from, including lobster clasps, toggle clasps, and magnetic clasps. When choosing a clasp, it’s important to consider the size and weight of your bracelets, as well as your personal style.
By mastering these basic techniques, you’ll be able to create beautiful bracelets in no time. With a little practice and experimentation, you can create a bracelet that is uniquely yours.
Preparing Your Workspace
Before you start making a bracelet, it’s essential to prepare your workspace. Having a clean and organized workspace will help you work more efficiently and minimize distractions. Here are some tips for preparing your workspace:
1. Choose a well-lit area
Select an area with plenty of natural light or bright overhead lighting. This will help you see the details of your work more clearly and reduce eye strain.
2. Set up a comfortable work surface
Choose a work surface that is at a comfortable height and provides enough space to spread out your materials. A large table or desk is ideal, but a smaller surface can work as well. Consider using a workbench or a tray to keep your materials organized.
3. Gather your tools and materials
Make sure you have all the tools and materials you need before you start. This may include pliers, wire cutters, beads, and stringing materials. Having everything within reach will help you work more efficiently and minimize interruptions.
4. Organize your supplies
Keep your supplies organized and easily accessible. Use containers, trays, or drawers to separate and store your materials. Label them clearly to avoid confusion and keep your workspace tidy.
By following these tips, you’ll be able to create a comfortable and organized workspace that will help you make beautiful bracelets with ease.
Measuring and Cutting String

Measuring and cutting string is a crucial step in making a bracelet. It is important to measure the string accurately to ensure that the bracelets fit comfortably around your wrist. In this section, we will discuss how to measure and cut string for a bracelet.
Measuring the String
To measure the string, wrap a measuring tape or a piece of string around your wrist. Add an additional 1-2 inches (2.5-5 cm) to the measurement to allow for tying the knots and for a comfortable fit. If you are making a bracelet for someone else, ask them for their wrist measurement or use a standard size chart.
Cutting the String
Once you have measured the string, cut it to the desired length. It is important to use sharp scissors to ensure a clean cut. If you are using embroidery floss, you can separate the strands and use only the number of strands needed for your bracelets. For example, if you are making a thin bracelet, you can use only 2-3 strands instead of all 6.
Tips for Cutting String
- Use sharp scissors to ensure a clean cut.
- Cut the string slightly longer than needed to allow for tying knots and for a comfortable fit.
- uIf you are using embroidery floss, separate the strands and use only the number of strands needed for your bracelet.
- Be sure to cut all the strings to the same length to ensure a symmetrical bracelet.
By following these tips, you can measure and cut the string accurately and create a beautiful bracelet.
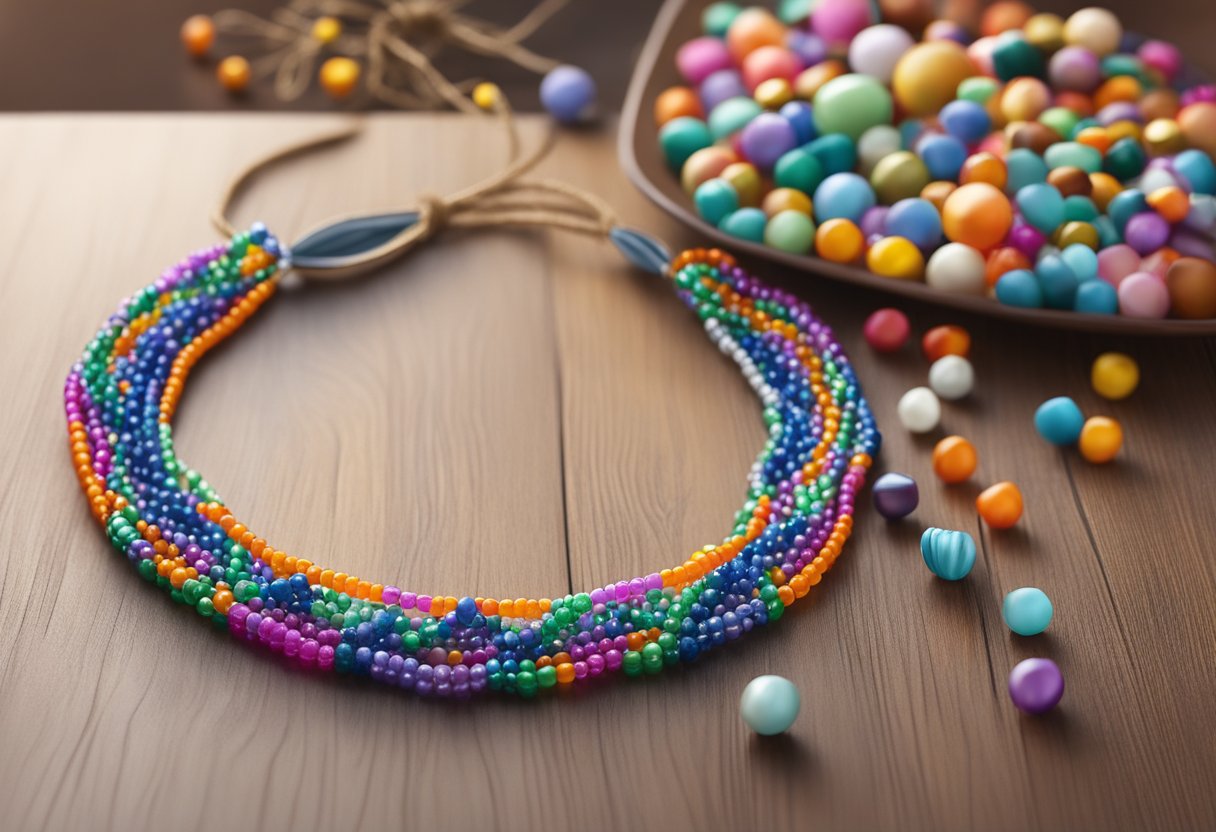
Adding Beads and Charms

Now that you have your basic bracelet structure, it’s time to add some personality with beads and charms. Here are a few tips to help you get started:
Beads
When it comes to adding beads to your bracelet, the possibilities are endless. You can choose from a variety of materials, colors, and sizes to create a look that’s uniquely yours. Here are some things to keep in mind:
- Choose beads that complement your bracelet’s color scheme. If you’re using multiple colors, make sure they work well together.
- Consider the size of your beads. Larger beads can add visual interest, while smaller beads can create a more delicate look.
- Don’t be afraid to mix and match different types of beads, such as glass, metal, and wood.
To add your beads, simply slide them onto your cord or wire in the desired pattern. You can use a bead stopper to keep them in place as you work.
Charms
Charms are a great way to add a personal touch to your bracelet. You can choose from a variety of themes, such as animals, sports, or travel, to create a look that reflects your interests. Here are some tips for adding charms:
- Choose charms that are the right size for your bracelet. If they’re too large, they can overpower the other elements.
- Consider the placement of your charms. You can add them evenly throughout your bracelet, or cluster them in one area for a focal point.
- Don’t be afraid to mix and match different types of charms, such as metal, enamel, and rhinestone.
To add your charms, simply attach them to your bracelet using jump rings. You can use pliers to open and close the rings as needed.
With these tips, you’ll be on your way to creating a beautiful and unique beaded bracelet with charms.
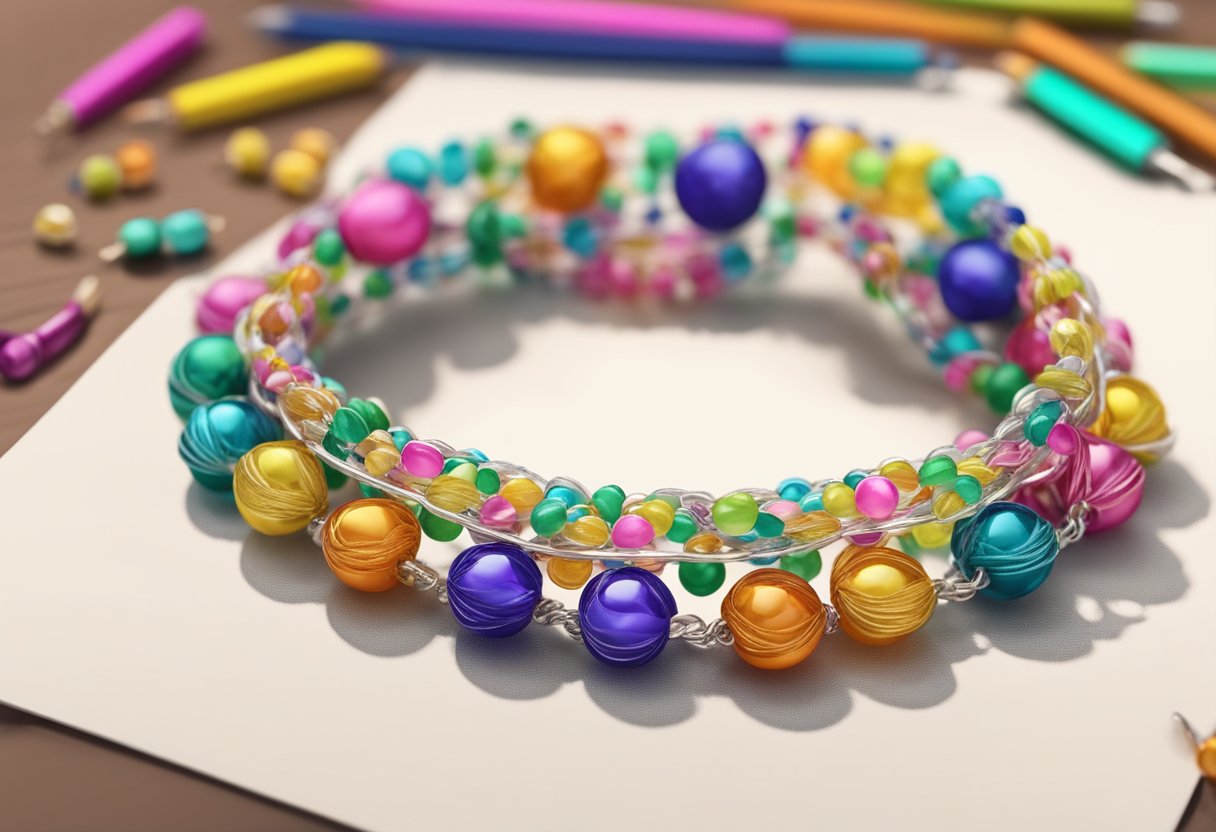
Knotting and Weaving Patterns

If you are looking for a fun and creative way to make bracelets, then knotting and weaving patterns are a great place to start. There are many different techniques that you can use to create unique and beautiful bracelets that are perfect for any occasion.
Macrame Knots
Macrame knots are a popular way to create bracelets that have a unique and intricate design. There are many different types of macrame knots that you can use, including the square knot, the half knot, and the spiral knot. Each knot creates a different effect, so it’s important to experiment with different knots to find the one that works best for your bracelet design.
Braiding Techniques
Braiding is another great way to create bracelets that are both stylish and durable. There are many different braiding techniques that you can use, including the three-strand braid, the four-strand braid, and the fishtail braid. Braiding is a great technique to use if you want to create a bracelet that is strong and sturdy enough to withstand everyday wear and tear.
Bead Weaving Patterns
If you want to add some extra flair to your bracelets, then bead weaving patterns are a great option. Bead weaving involves using a needle and thread to weave beads together into a pattern. There are many different types of bead weaving patterns that you can use, including the brick stitch, the peyote stitch, and the herringbone stitch. Bead weaving is a great technique to use if you want to create a bracelet that is both colorful and intricate.
In conclusion, knotting and weaving patterns offer a wide range of techniques that you can use to create unique and beautiful bracelets. Whether you prefer macrame knots, braiding techniques, or bead weaving patterns, there are many different options to choose from. So, get creative and start experimenting with different techniques to create bracelets that are truly one-of-a-kind!
Attaching Clasps and Closures

Once you have finished stringing your beads, you will need to attach a clasp or closure to your bracelet. This will allow you to easily put on and take off your bracelet.
Choosing the Right Clasp
The first step is to choose the right clasp for your bracelet. There are many different types of clasps to choose from, including lobster clasps, toggle clasps, and magnetic clasps. Consider the size and weight of your bracelet, as well as your personal preference when choosing a clasp.
Attaching the Clasp
To attach the clasp, you will need to use crimp beads or jump rings. Crimp beads are small metal beads that are used to secure the ends of your bracelet to the clasp. Jump rings are small metal rings that are used to attach the clasp to the bracelet.
To attach the clasp using crimp beads, slide a crimp bead onto the end of your bracelet and then slide the end of the clasp onto the bracelet. Loop the end of the bracelet back through the crimp bead and then use pliers to crimp the bead closed.
To attach the clasp using jump rings, slide a jump ring onto the end of your bracelet and then slide the end of the clasp onto the jump ring. Close the jump ring using pliers.
Tips for Attaching Clasps
Here are a few tips to keep in mind when attaching clasps to your bracelet:
- Make sure that the crimp bead or jump ring is securely attached to the bracelet.
- Use pliers to close the crimp bead or jump ring tightly.
- Choose a clasp that is easy for you to use and fits securely on your wrist.
- Consider adding a few extra beads to the end of your bracelet to give it a finished look.
By following these simple steps, you can easily attach a clasp or closure to your bracelet and have a beautiful piece of jewelry to wear or give as a gift.
Finishing Touches

Now that you’ve completed your bracelet design, it’s time to add the finishing touches to make it look polished and professional. Here are a few tips to help you achieve a great final look.
Use the Right Clasp
Choosing the right type of clasp is important for both the appearance and functionality of your bracelet. There are many types of clasps to choose from, including lobster clasps, toggle clasps, magnetic clasps, and more. Consider the style of your bracelet and how easy it is to put on and take off when selecting a clasp.
Knot and Trim the Ends
Once you’ve attached the clasp, it’s time to knot and trim the ends of your bracelet. Make sure to tie a secure knot and trim the ends close to the knot. If you’re using a material like leather or cord, you may want to use a dab of glue to secure the knot and prevent fraying.
Add a Charm or Bead
If you want to add a little extra flair to your bracelet, consider adding a charm or bead. This can be a fun way to personalize your bracelet and make it unique. Just make sure to choose a charm or bead that complements the style of your bracelet and doesn’t overpower it.
Polish and Clean
Finally, give your bracelet a final polish and clean to remove any fingerprints or smudges. Use a soft cloth or jewelry cleaning solution to gently clean your bracelet and make it shine. This will help your bracelet look its best and last longer.
By following these simple finishing touches, you can take your bracelet from a homemade craft to a professional-looking piece of jewelry that you’ll be proud to wear or give as a gift.
Caring for Your Bracelet
Congratulations! You’ve made your very own bracelet. Now, it’s time to make sure it lasts as long as possible. Here are some tips for caring for your bracelet:
1. Keep it Clean
Depending on the materials used in your bracelet, it may be susceptible to dirt, sweat, or oils. To keep it looking its best, gently wipe it down with a soft cloth after each use. If your bracelet is particularly dirty, you can use a mild soap and water solution to clean it. Just be sure to rinse it thoroughly and dry it completely before wearing it again.
2. Store it Properly
When you’re not wearing your bracelet, store it in a cool, dry place. Avoid leaving it in direct sunlight or near sources of heat, as this can cause damage to some materials. You can also store your bracelet in a jewelry box or pouch to protect it from scratches or other damage.
3. Handle it with Care
While your bracelet may be sturdy, it’s still important to handle it with care. Avoid pulling or tugging on it, as this can cause the beads or cord to stretch or break. If your bracelet has a clasp, be gentle when opening and closing it to avoid bending or damaging the metal.
4. Check it Regularly
It’s a good idea to check your bracelet regularly for any signs of damage or wear. Look for loose threads, frayed cords, or missing beads. If you notice any issues, it’s best to address them right away to prevent further damage.
By following these simple tips, you can help ensure that your bracelet stays looking beautiful for years to come.