Introduction to Simple Nail Art
Simple nail art refers to nail designs that are relatively easy for beginners to create at home. Unlike complex nail art, simple designs use minimal colors, strokes, and tools to decorate nails in a chic, elegant way.
The history of nail art dates back thousands of years to ancient Egyptian times when fingertips were stained with henna. Nail polish became popular in the 1920s when automotive paints were adapted into colored lacquers for nails. Complex nail art started emerging in the 1980s and 90s, but simple designs have remained popular for their wearability and effortless style.
Today, simple nail art is a mainstream trend and creative outlet. The minimalist designs are appealing for their subtlety and ability to complement any look. Simple nail art has also become popular for its therapeutic qualities and self-care benefits. Taking a few minutes to paint one’s nails can be a relaxing, meditative practice. Overall, simple nail art allows anyone to accessorize with beautiful nails using easy techniques.
Tools and Supplies for Simple Nail Art
To get started with simple nail art designs, you only need a few basic tools and supplies. Here are some of the key items to have on hand:
- Base and Top Coat – A good base coat helps the nail polish adhere to your nails and prevents stains. Top coat seals in your design and adds a shiny finish. Go for fast-drying formulas.
- Nail Polish Colors – Build up a collection of your favorite nail polish colors and finishes. You’ll want basics like neutrals, pinks, reds, as well as fun shades like blues, greens, purples, blacks, and glitters.
- Dotting Tools – These tools have different sized round ends for creating dots and other shapes. Start with a basic dotter set that has multiple sizes.
- Striping Tape – Available in various colors and widths, striping tape lets you create clean lines and geometric patterns. Try a pack with different options.
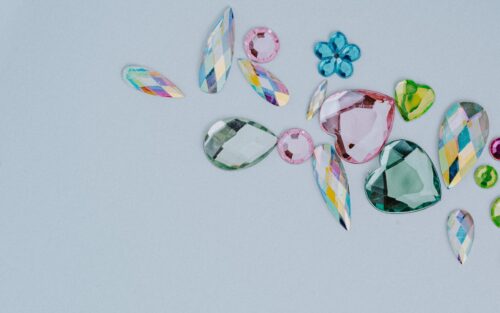
- Rhinestones – Small rhinestones can add sparkle and interest to any simple nail design. Look for a multi-size set of crystal clear and colored rhinestones.
The right base supplies allow you to create a wide range of easy nail art looks. Focus on polishes in colors you love, and add in a few key tools like dotters and striping tape to expand your design possibilities. With just a handful of items, anyone can make their own stylish manicures at home.
Nail Prep
Proper nail prep is key to creating clean, long-lasting nail art. Follow these steps:
File and shape nails – Use a nail file to shape nails and remove any rough edges or hangnails. File in one direction starting from the outside of the nail towards the center. File at a slight angle for a smooth slope and rounded tips. Avoid overfiling or thinning out nails too much.
Cuticle care – Gently push back cuticles with a cuticle pusher/stick. Never cut cuticles, as this can damage the nail bed. After pushing back cuticles, use cuticle remover or soak fingers in warm water to soften cuticles. Gently remove any loose, dead cuticle tissue with a towel or washcloth.
Clean nails – Wash hands thoroughly with soap and water, then use acetone or nail polish remover to remove any traces of oils, lotions or old polishes. Scrub nails with a nail brush. Rinse and dry nails completely.
Dehydrator/primer – Apply nail dehydrator or primer to clean, dry nails. This removes any moisture and preps the nail surface for polish application. Allow primer to dry completely before starting your nail art. Using a dehydrator/primer helps polish adhere smoothly and prevents chipping or peeling.
Proper nail shaping, cuticle care, and a dehydrator/primer are essential first steps to create a clean nail canvas and long-lasting nail art.

Base Coat Application
Applying a base coat is one of the most important steps when doing nail art. The base coat helps the polish adhere to the nail, prevents staining of the nail bed, and provides a smooth foundation for your designs. There are a few different base coat options to consider:
Regular Base Coat – This is your standard base coat that provides protection for nails. It helps prevent staining and chipping. Any inexpensive drugstore base coat will work fine.
Ridgefilling Base Coat – This type of base coat is ideal if you have ridges or grooves in your nails. It helps fill in uneven textures to create a smooth surface. The ridgefilling base coats tend to be a bit thicker than regular base.
Peel-off Base Coat – A peel-off base coat creates a barrier between your nail and the polish so that the designs can be easily peeled off without using nail polish remover. This allows you to change designs frequently. Most peel-off base coats need to be reapplied every couple of days.
pH Bonding Base Coat – This bonds to the natural nails for long-lasting wear. It provides a strong foundation for more intricate nail art. pH bonding base coats are a great choice if you want your designs to stay put for 7+ days.
When applying your base coat, be sure to use thin and even coats. Apply it over the entire nail area, wrapping the tips to seal in protection all over. Let the base coat dry completely before moving onto polishing or designs. This helps prevent smudging. A good rule of thumb is to allow 2-3 minutes of drying time between coats. Using quality base coat allows your nail art to really pop!
Simple Nail Art Techniques
Some of the easiest nail art techniques that create a big impact are polka dots, stripes, color blocking, and accent nails. These simple designs are beginner-friendly and can be done at home without much practice.
Polka Dots
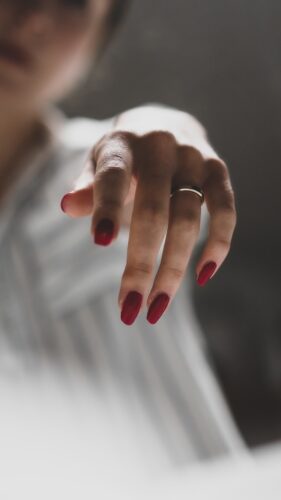
Polka dots are a classic and fun nail art technique. To create polka dots, use a dotting tool dipped in nail polish to make uniform dots of various sizes on the nails. Start with bigger dots on the lower half of the nail, and make smaller dots as you move up towards the cuticle area. This will create dimension. Use a toothpick to create micro dots. Play around with different color combinations like black and white polka dots or multi-colored dots.
Stripes
Horizontal, vertical, or diagonal – striped nail art is striking. Paint thin stripes with a striping brush, or use tape to mask off sections for clean stripes. Experiment with different stripe sizes and color combinations. Keeping one nail a solid color while striping the rest is an easy accent nail idea. For perfect lines, apply a fast drying top coat between colors.
Color Blocking
Color blocking is filling in different sections of the nails with different colors. To try this, divide the nail into sections and paint each part a different shade. For example, paint the tips one color, the middle band another color, and the base a third color. You can also create chevron shapes, negative space, or other geometric designs. Use tape for clean lines.
Accent Nails
Accent nails are a way to add subtle interest to a monochrome manicure. Paint one or two nails a different color as an accent. You can also add nail art like dots, stripes, or glitter to accent nails while keeping the rest of the nails a neutral background color. This makes coordinating accent nails easy.
These simple techniques add artistic flair to any manicure. With some practice, anyone can master these beginner nail art ideas for beautiful nail designs.
Nail Art with Rhinestones
Rhinestones can add an elegant touch to any nail design. There are a few tips to follow to ensure proper application and longevity when using rhinestones for nail art.
Types of Rhinestones
- Swarovski crystals – These are high quality, precision cut glass crystals that come in a variety of shapes and sizes. They have a brilliant sparkle.
- Preciosa crystals – Another premium Czech glass crystal brand. These have a bright, rainbow reflection.
- Machine cut rhinestones – Affordable option that uses a machine to cut the glass. The edges won’t be as smooth as precision handcut.
- Acrylic rhinestones – Made of acrylic rather than glass. These are more durable for nails.
Tools for Application
- Nail dotting tool – Use the end to pick up a small rhinestone and place it onto the nail where desired.
- Wax pencil – Use this to mark where you want the rhinestones placed.
- Tweezers – Helpful for picking up tiny rhinestones.
Placement Tips
- Apply rhinestones before your top coat to allow them to adhere to the polish underneath.
- Place rhinestones towards the cuticle area for more stability. Avoid the free edge where they can pop off.
- Follow any line art or patterns in your design when placing rhinestones.
- Use different sizes together for interest.
Top Coat
Apply a fast-drying top coat over the rhinestones to seal them in. Ensure the top coat covers all edges of the rhinestones to keep them locked in place.
Simple Floral Nail Art
Florals are a classic and timeless nail art choice. With just a few simple techniques, you can create stunning floral designs on your nails that will have all your friends asking where you got them done. Here are some easy floral nail art ideas you can do at home:
Dotted Flowers
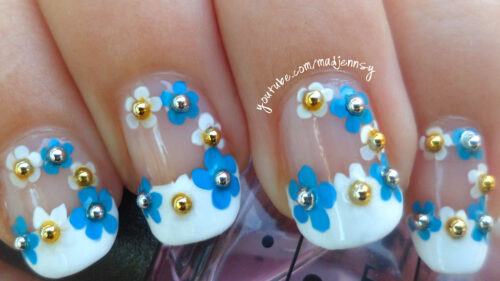
One of the simplest floral nail art techniques is dotted flowers. All you need is a dotting tool (or toothpick) and your choice of nail polishes. Start by painting your base color on all nails. Once dry, use the dotting tool and a contrasting color to dot on flower shapes – 5 dots together make a simple flower. Do a couple flowers on each nail, using different color combinations. Let dry fully before adding a top coat to seal in the design.
Painted Flowers
For a more defined flower look, paint on flowers using a small brush. Start with your base color, then use the brush to paint on flower petals in a contrasting color. You can do all one color flowers, rainbow colors, or ombre tones. Let the painted flowers dry fully before finishing with a top coat. For an easier approach, look for nail stickers or decals with floral designs to apply on top of your base color.
Floral Striping Tape
Striping tape is an easy hack for perfect flower shapes every time. Simply cut or tear off pieces of striping tape in flower shapes, place onto your nail where desired, and paint over with a top coat to seal it in. Once dry, gently remove the tapes to reveal beautiful floral designs underneath. Try combining striping tape with painted on flowers for a fun mixed media look.
With a few simple tools, you can create endless floral nail art designs right at home. Have fun mixing and matching colors and flower shapes to fit your mood or style. The possibilities are endless when you keep it simple!
Minimalist Nail Art
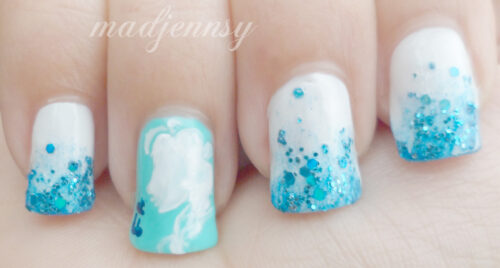
Minimalist nail art focuses on clean lines, negative space, and monochrome color palettes for an understated yet artistic look. This style uses geometric shapes and patterns in a subtle way to add interest to nails without being overly complex or ornate.
Some ideas for minimalist nail art include:
- Single diagonal stripe across all nails in a solid color like black, white, or gray
- French tip manicure with a thin clean line
- Alternating solid color and negative space on each nail
- Single triangle or dot on one accent nail
- Thin parallel or crossing lines in a single color
- Small geometric shapes like circles, squares, or triangles in a pattern
- Gradient color palette fading from dark to light
- Single letter or number on one finger
The key to minimalist nail art is keeping the design simple and leaving plenty of negative space showing through. This creates a clean, modern look. Stick to monochromatic color palettes and avoid adding too many elements. The minimalist style highlights the nails’ natural shape while adding subtle artistic flair.
Simple Geometric Nail Art
Geometric shapes and lines are a classic, easy way to add interest to your nails. You can get creative with simple designs like chevrons, triangles, straight or wavy lines, and dots.
To create triangles, first paint your nails a base color. Let the polish dry completely before moving on. Use a small brush and black nail polish to paint triangles along the tips of your nails, either pointing up or down. Connect the triangles into chevron shapes for a fun look.
For straight or wavy lines, start with a base coat and let it dry fully. Then use a nail art brush dipped in your chosen color to draw lines across your nails. Make the lines thin or thick, and keep them straight or get playful with waves and zigzags.
Dots are one of the simplest nail art techniques. After applying a base color, use the pointed end of a dotting tool dipped in contrasting polish to add dots along the tips or over the entire nail. Make the dots different sizes for interest. You can also connect the dots to create triangles.
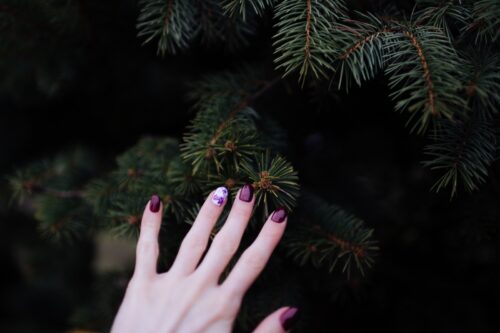
The great thing about geometric nail art is you don’t need fancy brushes or tools—though they can help. A toothpick, bobby pin, or paper clip dipped in polish can create lines and shapes. Get creative with different color combos, patterns, and designs for simple yet eye-catching nail art!
Caring for Nail Art
Nail art designs take time and effort to create, so you’ll want to take steps to make them last as long as possible. Here are some tips for caring for your nail art manicure:
Avoid Chips and Damage
- Be gentle with your nails and avoid using them as tools. Things like opening soda cans, prying open packages, etc. can cause chips and cracks.
- Wear gloves when doing household chores involving chemicals and water. The moisture can cause lifting and damage to nail art.
- Use your fingertips when typing or texting rather than tapping with your nails. This will reduce stress on the tips.
Apply a Top Coat
- Finish off your nail art with a shiny top coat like Seche Vite. This helps seal in the design and provides a smooth, glossy surface.
- Reapply the top coat every other day to maintain the seal and prevent chips.
Smart Removal
- When it’s time for removal, avoid aggressively peeling off nail polish as this can remove layers of your natural nails too.
- Use an acetone-free nail polish remover and cotton balls to gently dissolve the polish.
- Buff your nails lightly before reapplying polish, as leftover polish or glue can impede adhesion.
By being gentle on your nails and using a protective top coat, you’ll be able to keep your designs vibrant for as long as possible! Proper removal is key as well to avoid damage.


